We offer highly cost-effective products and professional after-sale service for the marine, HVAC, water, oil & gas, fire fighting industries. Our valves, all delivered by experienced technicians, are of guaranteed good quality.
> Water > HVAC > Marine > Oil & Gas > Industry > Fire FightingWith years of experience, I-FLOW knows the market very well. We can provide excellent one-stop solutions for our clients. For more information about our valves and service, contact us today!
> CEO'S Greeting > Our factory > Career & culture > Fairs and eventsI-FLOW has an excellent R&D team. Managed strictly under ISO 9001, we inspect and test each of our valves to make sure 100% qualified.
> Research & Development > Quality Control > Quality Assurance > CertificatesWe, together with our associated companies, have obtained various types of certificates, including CE, WRAS, DNV, GL, LR, ABS etc. I-Flow valves are now widely used all over the world, in Shangrila Hotel, Kerry Center, Milan Expo, Fiat Workshop, IKEA, COSCO vessels, etc.
> Marine > HVAC > Water Treatment > Oil & GasAccumulating 10 years' experience in valves, we are an excellent solution provider. Keep in touch now and experience how your needs are well addressed.
> Client Stories > Our Projects > Company News > Industry NewsWith over 10 years of experience in the industry of valves, I-FLOW will provide the perfect solution for your project. Contact us now, we will solve all your problems.
> Download > After-sale Service > FAQs en |
We will contact you within 24 hours.
This guide walks through the step-by-step process of installing and testing fire sprinkler systems, highlighting best practices and regulatory standards.
Fire Sprinkler System Installation
1. Planning and Design
Installation begins with a carefully engineered design tailored to the building layout and occupancy. Key considerations include:
The system is mapped out using CAD software, detailing sprinkler head locations, pipe routing, and control valve placement.
2. Obtaining Permits
Before installation begins, the design must be reviewed and approved by local fire authorities or building departments. This step ensures the system meets code requirements and avoids future delays or penalties.
3. Pipe and Head Installation
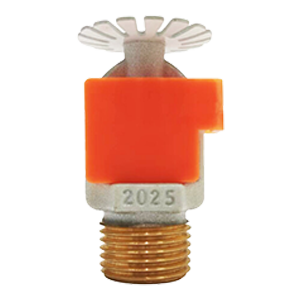
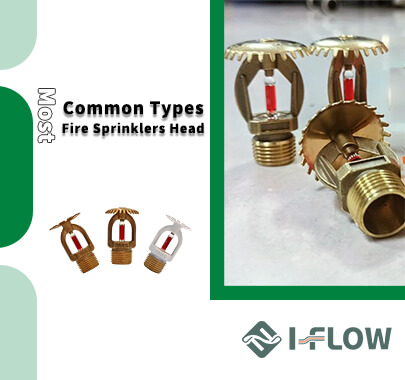
Contractors install a network of pipes (steel, CPVC, or PEX) connected to the water supply. The pipes are routed throughout the building, and sprinkler heads are strategically mounted—typically in ceilings, walls, or concealed spaces.
4. System Integration and Final Checks
Once physically installed, the system is integrated with the building’s fire alarm and electrical systems. At this stage, the installer ensures:
Fire Sprinkler Testing
1. Hydrostatic Pressure Test
This test ensures the pipe network can withstand pressure without leaking. It involves filling the system with water and pressurizing it (typically at 200 psi or 50 psi above operating pressure) for 2 hours, per NFPA 13 standards.
2. Flow Test
This test verifies adequate water flow to the sprinkler heads. It involves opening a test valve to simulate a fire event and monitoring the system’s pressure drop and flow rate using a pitot gauge or flow meter.
3. Alarm Testing
Flow switches and pressure sensors are tested to ensure the alarm activates during a fire.
4. Trip Test (for Dry Pipe Systems)
In dry sprinkler systems, the trip test verifies how long it takes for water to reach the most remote head after valve activation. The time must fall within NFPA guidelines.
Ongoing Inspection and Maintenance