When a PN25 ball valve fails — whether due to leakage, corrosion, or operational wear — replacing it correctly is critical to maintaining system safety, avoiding costly downtime, and ensuring long-term performance. This guide walks you through why, when, and how to replace a PN25 ball valve, with safety tips and best practices from industry standards.
1. Understanding the PN25 Ball Valve
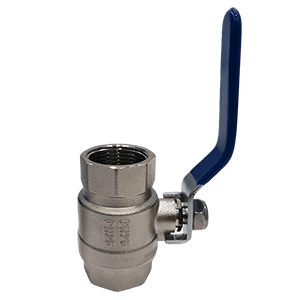
PN Rating: "PN" stands for Pressure Nominal. PN25 means the valve is rated for 25 bar working pressure at a reference temperature, usually 20°C.
-
Design: A ball valve uses a rotating ball with a hole (bore) to control fluid flow. When aligned with the pipeline, the valve is open; when turned 90°, it shuts off flow completely.
-
Applications: Ideal for high-pressure water, steam, compressed air, oil, and certain chemicals.
-
Material Choices: Commonly available in stainless steel, carbon steel, and brass, each suited for different environments.
2. Signs It’s Time to Replace Your PN25 Ball Valve
Even though PN25 ball valves are built for durability, they aren’t immune to damage. Look out for these symptoms:
-
Persistent Leakage – Drips from the body, stem, or connections despite proper closure.
-
Handle Resistance – Difficulty turning the handle, which may indicate internal corrosion or debris buildup.
-
Internal Bypass – Fluid passes through even when the valve is closed.
-
External Corrosion or Cracks – Especially in aggressive environments.
-
Worn Seals or Seats – Causing reduced shut-off capability and increased wear.
If you notice any of these, continuing to operate the valve could risk safety incidents, environmental hazards, or unplanned downtime.
3. Preparing for PN25 Ball Valve Replacement
Safety First
Lockout/Tagout (LOTO): Shut down the system and secure it to prevent accidental re-pressurization.
-
Depressurization: Verify with gauges that all pressure is released before disassembly.
-
Drainage: Remove residual fluid from the pipeline to avoid spills.
Tools & Materials You’ll Need
-
New PN25-rated ball valve (correct size, material, and connection type)
-
Adjustable wrench or torque wrench
-
PTFE thread seal tape or anaerobic thread sealant
-
Replacement gaskets (for flanged valves)
-
Cleaning brush or cloth for connection surfaces
-
Safety gloves and protective eyewear
-
Bucket or hose for draining residual fluid
4. Step-by-Step Replacement Process
Step 1: Isolate and Depressurize
Shut off upstream and downstream valves to isolate the section. Open a drain point or bleed valve to relieve pressure.
Step 2: Drain the Pipeline
Drain any liquid or gas in the section to avoid spillage during removal.
Step 3: Remove the Old PN25 Ball Valve
-
Threaded Connection: Use a wrench to turn counterclockwise. Support the opposite pipe to prevent stress on joints.
-
Flanged Connection: Loosen bolts in a crisscross pattern to avoid flange distortion.
-
Welded Connection: Requires cutting — this step should only be done by certified welders.
Step 4: Inspect and Clean
Examine pipe threads or flange faces for damage. Clean thoroughly to remove sealant residue, rust, or gasket remnants. Any debris could cause leaks in the new installation.
Step 5: Install the New Valve
-
Threaded Valves: Wrap male threads with PTFE tape (clockwise). Thread the valve in place, tightening securely without overtightening.
-
Flanged Valves: Position the gasket, align bolt holes, and tighten bolts evenly with a torque wrench.
-
Welded Valves: Align and weld according to industry codes, then inspect the weld for quality.
Step 6: Test for Leaks
Slowly re-pressurize the system while checking for leaks around connections and the valve body. If any leaks are found, depressurize and re-tighten connections.
5. Choosing the Right Replacement PN25 Ball Valve
Material:
-
Stainless Steel – Corrosion-resistant, ideal for aggressive chemicals or marine environments.
-
Brass – Durable and cost-effective for potable water and HVAC.
-
Carbon Steel – Excellent for steam and industrial oil pipelines.
-
End Connection: Threaded, flanged, or welded — match your existing pipeline.
-
Bore Type: Full bore for maximum flow, reduced bore for throttling or space-saving.
-
Temperature Rating: Ensure compatibility with your process temperature.
6. Maintenance Tips to Extend Lifespan
-
Operate the valve periodically to prevent seizure.
-
Install strainers upstream to protect the ball and seats from debris.
-
Avoid over-torquing the handle to prevent stem damage.
-
Conduct annual inspections, especially in high-use or harsh environments.
7. Common Mistakes to Avoid
-
Skipping Depressurization: Extremely dangerous — always confirm zero pressure before removal.
-
Mismatched Ratings: Installing a valve with lower PN or temperature rating than required.
-
Overtightening Threads: Can crack the valve body or distort sealing surfaces.
-
Reusing Old Gaskets: Often leads to leaks in flanged installations.


.png "luga")
 en |
en |


